If you have ever dreamed of creating wood-carved caricatures, this is the right place. You will learn all about the design and safety. You can make a simple caricature into an artful masterpiece. These tips will help you create a unique caricature. There are also classes offered by caricaturists.
Techniques
Wood carving caricatures can be a very unique type of sculpture. They're funny and can tell a tale without words. Caricature is a fictionalized representation of a person. Dave Stetson, wood carving carvers, has a strict code that ensures realistic representations of real people. They also have specific rules that must be followed in order to create effective caricatures. This article will discuss the basics and give some tips for creating a caricature.
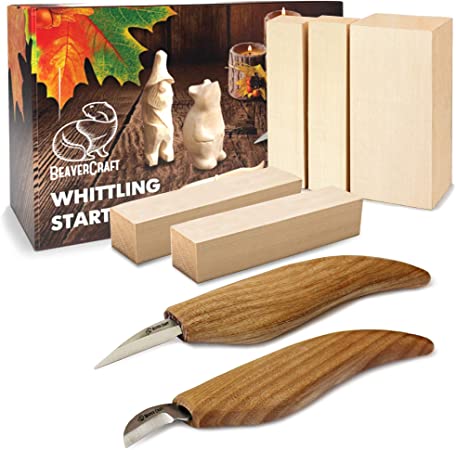
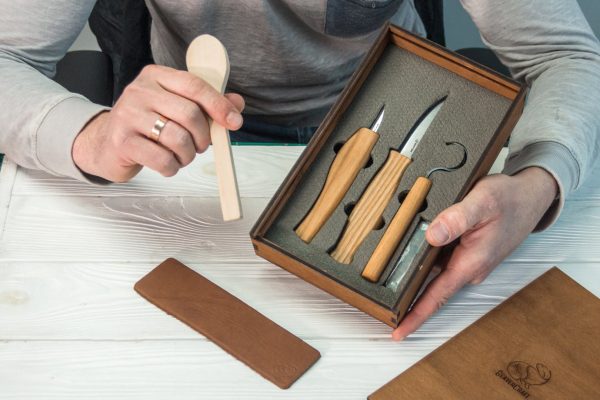
First, it is important to focus on the technique for carving an astronaut. The two most delicate tools for carving an astronaut are the whittling or spoon knives. To make it easier to work with, templates can be used while you carve the astronaut. Finally, a good tutorial will provide step-by-step instructions on how to finish your caricature. You may want to consider purchasing a tutorial for this topic if your budget is tight.
Designs
There are many options for creating wood-carved caricatures. It is a good idea to use a pattern. You can also buy a cardboard cutout to use for different types caricatures. You can also use the tutorial to carve a caricature. This article will provide information on the best methods and designs to carve a caricature.
Fred's first caricature was called "Aristocrats of the Roads". It depicted two men who wandered. It was made of Honduras Mahogany. Fred entered it to competitions, and won numerous awards. He also featured the Chipping Away Catalog. Fred also carved a caricature Luciano Pavarotti in 2009, earning him the Second Runner-Up Award at a national woodcarving convention.
Eyes
When carving caricatures, one of the most important things you should learn is how to ensure that the eyes look real. While there is nothing wrong with a realistic looking eye, a caricature that lacks the right amount of detail may leave the viewer dissatisfied with the final piece. You can make sure your eyes are perfectly symmetrical by taking a photo of an existing carving. Follow the steps in the photo.
Next is to determine the eye shape. Some carvers use the identical eye shape to create their eyes. Others use different shapes to create more believable eyes. Stop cuts can be used to make your eyes symmetrical. The iris and pupil will also need to be carved. Now you are ready to start carving the caricature.
Safety
Wood carving caricatures are unique in their designs. These caricatures can tell a story with no words and are created by skilled artists who take great care to ensure accuracy. Caricatures are depictions of people and objects that are exaggerated to communicate an impression, or humor. Dave Stetson, wood carving carver has established stringent rules for carvers safety and quality.
Before carving a caricature, first, clean the wood and remove any pencil marks. You can clean the surface with water or dish soap. To carve the neck and head, use a V-shaped 60 degree tool. A 60-degree V-shaped tool can be helpful in the carving process, as it cuts wood very easily. The Ramelson 60 degree V-shaped carver tool is a good choice. It is both sharp and simple to use.
Materials
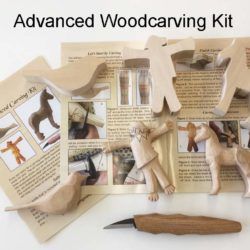
Learning how to carve animals using materials such as wood and wire is a fun and challenging method. Even though animal caricatures might not be as complex as human caricatures but they are still entertaining and can tell a story with no words. Caricatures exaggerate the realism of life. Carving caricatures can be a challenging hobby for some beginners, but for the more experienced carver, there are a number of materials to consider.
You will need chisels as well as a board of wood to complete your carving. A hammer and chisels are also required. Acrylic white paint can be used as the base layer. It is available at craft stores. The second layer can be added once the base layer is completed. This layer will consist of a golden brown paint and a few drops of burnt sienna (Academy). For the face, you should use 2 drops of sunkissed peach.
FAQ
What else should I know about woodworking in general?
It's easy to underestimate the amount of work involved in making furniture. Finding the right wood for the project is the hardest part. There are so many options for wood, it can be difficult choosing the right one.
Another problem is that not all wood has uniform properties. Wooden can split or crack, while some woods may warp. These factors should be taken into account before buying wood.
Do I need to be a genius to succeed in woodworking?
No. Woodworking does not require any special skills. Anyone can learn to use basic powertools and techniques to create beautiful work of art.
How can my shop be organized?
The first step toward keeping your workshop clean and organized is to set aside a designated area for storing tools. You want your tools to stay clean and free from debris and dust. You can hang tools and accessories with pegboard hooks.
Where can I find my woodworking tools?
There are many places you can get everything you need, and you don't have to go far. For example, you could visit local hardware stores or look online at websites like Amazon.com.
You can also check garage sales and flea markets for old furniture and other materials you can reuse.
What amount of money do I need to get started with my business?
Because each project is unique there are no exact numbers. These are the factors that will give you an idea of how much you'll need.
-
Materials cost
-
Tools and equipment
-
Time spent working on this project
-
Your hourly rate
-
What is your expectation for profit?
-
You can hire help, regardless of whether you have a plan.
You might start small if you are just starting out. As you gain more experience, you will be able tackle more complicated projects.
Is there a way to start my own woodworking company?
It is difficult to start your own woodworking company. There are many requirements and regulations that must be followed. You don't have to go through all that hassle of setting it up. Many people decide to join established businesses. You only need to pay membership and tax fees.
What type of wood should I choose?
The most commonly used woods for woodworking are oak, maple, cherry. Each wood type has its own characteristics which affect the final product's appearance and feel. Oak tends to be harder and darker than other woods. Birch is soft and light, and mahogany is denseer and heavier. There are two options: solid wood and veneers. Veneers consist of thin sheets made from wood and glued together to form a single layer.
Statistics
- Woodworkers on the lower end of that spectrum, the bottom 10% to be exact, make roughly $24,000 a year, while the top 10% makes $108,000. (zippia.com)
- Overall employment of woodworkers is projected to grow 8 percent from 2020 to 2030, about as fast as the average for all occupations. (bls.gov)
- If your lumber isn't as dry as you would like when you purchase it (over 22% in Glen Huey's opinion…probably over 10-15% in my opinion), then it's a good idea to let it acclimate to your workshop for a couple of weeks. (woodandshop.com)
- The U.S. Bureau of Labor Statistics (BLS) estimates that the number of jobs for woodworkers will decline by 4% between 2019 and 2029. (indeed.com)
External Links
How To
How to join wood without using nails
Woodworking is a favorite hobby. You can make useful items from wood with your hands, which is both relaxing and fun. Sometimes you may want to join two pieces together of wood without using nails. This article will show you how to do it to make your woodwork projects look great.
Before joining the pieces of wood together, you will need to first trim any edges. You don't want to leave sharp corners that could cause problems later on down the road. Now it's time to start glueing your boards together.
If you are working with hardwood, only one side should be glue. If you are using softwoods such pine or cedar, glue should only be applied to one side. Press the boards down until the glue is fully incorporated. Be sure to let the glue dry before you move on to the next step.
After you have glued your boards, drill holes where you want to insert screws. Depending on what type screw you choose, the size of these holes will depend on how big they are. For example, if you intend to use 1/2-inch wood screws, you need to drill a hole that is at most 3/4 inches deep.
Once you've drilled your holes, you'll want to drive the screws through the joint and into the backside of the board. Be careful not to hit the front surface of the board, or else you'll ruin the finish. When driving the screws, try to avoid hitting the ends of the screws too much. This will avoid splitting in the wood's ends grain.
Once your project is complete, it's time to protect it against the elements. You can seal the furniture pieces or cover the top. It doesn't matter what method you use, you want something that will last many years. Examples include oil-based varnishes and polyurethanes, shellac, lacquer and others.
These products are available at most home improvement stores. Just make sure that you buy the right kind for the job. Don't forget to keep in mind that some finishes are toxic. Protective gear should always be worn when handling these finishes.