Now is the perfect time to take a woodturning course if you ever wanted to create your own spoons or bowls. Mesa County Libraries is hosting a "Learn About Woodturning" class for the community. Grand Valley Woodturners member Instructor Buck Taylor will be teaching participants the basics of woodturning and the tools required to make them. He will also teach the basics of woodworking and discuss different types of wood, as well as the tools used to make them.
Basics of Woodturning
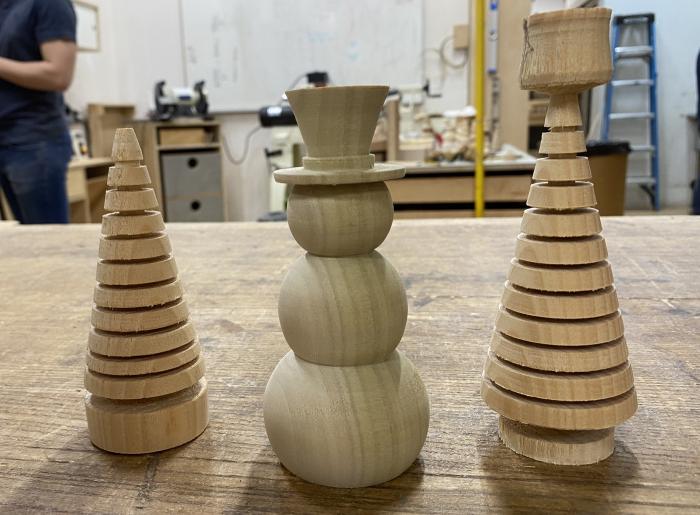
Woodturning allows you to do what you want. So you might end up with something completely different than your original idea. But it's a highly rewarding skill that allows one to make their own decisions. Woodturning allows you to shape wooden pieces into almost any shape and design that you like, which is something not many woodworking disciplines offer. Follow these guidelines to turn masterworks.
Before you begin woodturning, you must learn about the equipment you'll need. A lathe, wood shaping tools, sharpening tools, and safety goggles are essential for the project. The tools you'll need aren't expensive or large; some beginners make their own lathes from a power drill. It is necessary to be familiar with the speed and the exact diameter of your pulleys in order to accurately turn the wooden block.
Techniques
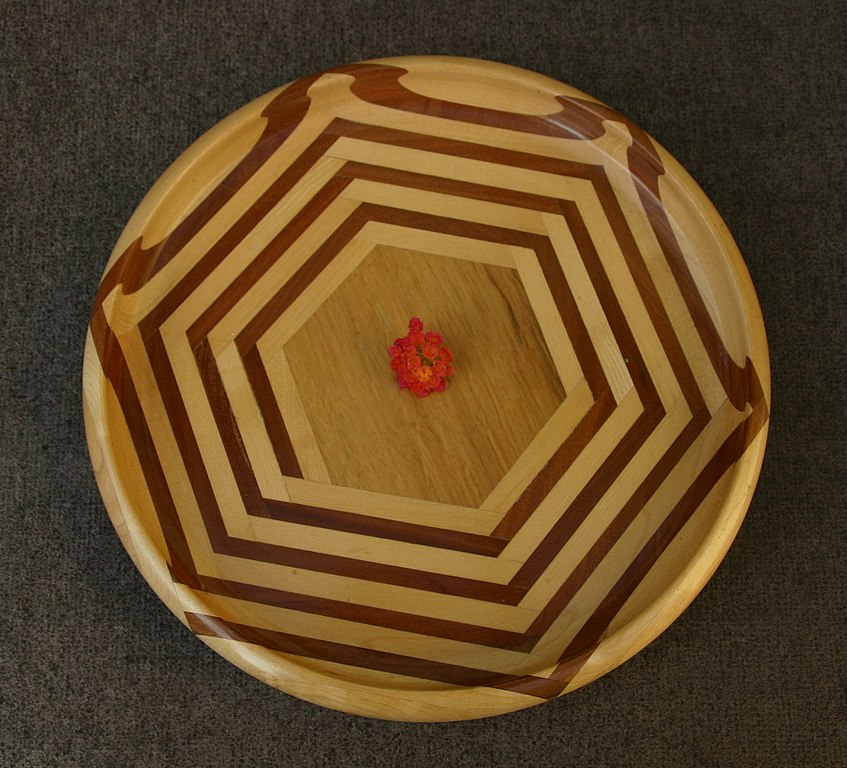
A wood turning class will show you how to turn beautiful bowls from selecting the right logs to sanding the techniques. Additionally, you will learn how to turn natural edges and chainsaw logs. You'll also learn how to make unique designs and enhance your bowls using different tools. No matter if you're a beginner or an experienced turner, you can learn the techniques to make beautiful bowls.
The first Techniques for Wood Turning Classes will teach you the basics of woodturning. The instructor will demonstrate how small bowls and spindles can be turned. You'll also learn how to properly sharpen your tools and what tools and wood are needed for turning. You'll be leaving the class with a cut board that has endgrain, a bowl and even a piece from end grain wood.
Tools
There are many different types of woodturning tools you can choose from. A woodturning class is a good option for beginners. You will learn all about the woodturning process and the basics of tool selection. The instructor will show you how to safely use a lathe. You will also learn about tool angles and chucking systems. There will be plenty of hands-on time at the lathe, so you can practice your skills right away.
Different techniques require different types of tools. Carbide tools can be used for small projects. These tools are also more affordable than traditional HSS instruments. Carbide tools are great for turning pen blanks and small bowls. Carbide tools allow you to master the basics of woodturning, while remaining affordable. To make the best products, you need to know how to properly use these tools. Wikipedia has a great article that explains how to turn wood into tools.
You can take a woodturning class at these locations
There are many places that offer wood-turning classes. You can either take one lesson or a course that lasts a whole day. Or you could do both. No matter which class you choose, you'll leave the class with a new skill and a finished shallow cherry bowl. Below are some suggestions to help you choose the right class. The best places for wood-turning classes depend on the skills you're looking to master.
The woodturning classes are designed to suit the individual student's needs. You will be guided step-by–step through the process, regardless of whether you want one-on–one tuition or group lessons. A 1-day class can cover all the basics from turning an object to sharpening tools to using a lathe. Some classes offer food safe finishes so you can apply them on your work.
FAQ
How often should I buy new supplies?
Some tools will need to be replaced over time. Sharpening hand tools is a must. You'll also need to replace parts if you use power tools. Spread your purchases over several months to avoid purchasing too many items at once.
Is it difficult to start my woodworking business?
It is difficult to start your own woodworking company. There are many requirements and regulations that must be followed. But, this doesn't mean you need to go through all of the trouble of setting up your business. Many people prefer to join existing companies. This allows you to join existing businesses and pay only membership fees.
What's the difference?
Hobbyists love making things from wood while professionals are more concerned with the quality of their work. Hobbyists often take pride in the creations they make and often share them to family and friends. Professionals will spend hours researching designs before they begin working on a project. They'll pay great attention to details, from choosing the most suitable materials to finishing the work perfectly.
What woods can be used to make furniture?
Woods are classified by their hardness. Softwoods include cedar and pine as well as cedar and cedar. Because they are resistant, they can be used for outdoor furniture. The hardwoods are oak, maple and mahogany. Because they can't weather outside, they're usually used indoors.
Statistics
- Woodworkers on the lower end of that spectrum, the bottom 10% to be exact, make roughly $24,000 a year, while the top 10% makes $108,000. (zippia.com)
- Most woodworkers agree that lumber moisture needs to be under 10% for building furniture. (woodandshop.com)
- The best-paid 10 percent make $76,000, while the lowest-paid 10 percent make $34,000. (zippia.com)
- If your lumber isn't as dry as you would like when you purchase it (over 22% in Glen Huey's opinion…probably over 10-15% in my opinion), then it's a good idea to let it acclimate to your workshop for a couple of weeks. (woodandshop.com)
External Links
How To
How to drive a nails in wood
It is essential to pick the right size and style of hammer before you can drive a nail in wood. There are many types of hammers that you will find: claw hammers and sledgehammers; mallets; ball peen hammers; and hatchets. Each type of hammer has its pros and cons. A clawhammer works best when hitting something hard like nails. However, it can sometimes be difficult to see exactly where the strike is going. Although a sledgehammer can be used to hit large areas quickly, it is too heavy to be useful for small tasks.
After choosing the right hammer, place your hand flat against the side of the head so that the handle rests comfortably in your palm. Hold the handle in your hand, but don’t force it too hard that you break. Keep your wrist relaxed and the hammer straight up. You should then swing the hammer straight up, keeping your wrist relaxed. You should feel the impact of your hammer hitting the nail. If you're having trouble getting the hang of swinging a hammer, practice with a block of wood until you get the rhythm down.
Once you are ready to drive the nail, place the hammer close to your body. To ensure that the nail is perpendicular on the surface of the wooden floor, position it. Keep your eyes focused directly on the tip of the nail. Swing the hammer forward, and then move the hammerhead. Repeat this action several times, gradually increasing the speed of the swing. Once you have mastered this technique, increase the power of your swings. You can hold the hammer over your shoulder and forcefully bring it down. This will allow you to exert more energy.
Once you have made the first hole, remove your hammer. To remove the remainder of the nails, you can use a screwdriver/pry bar. To avoid splitting the wood, make sure the nail heads are not touching the board's surface.