There are a variety of turning tools you can use in your workshop. You can use the Bowl gouge and Spindle roughing touge as well as the Faceplate gouge. Others are more suited to specific wood types like oak or walnut. These are some helpful tips to help you choose the right tools. Here are the most commonly used types of turning tool. Take the time to consider all of your options and then make a decision that is within your budget.
Faceplate turning
Woodworking techniques can include the use of a faceplate. These can be simple molds or intricate designs made from the wood. These are just a few examples of faceplate design. The trophy base is straight while the rosette uses deeper beads with coves. Both require great care and attention to detail. Read on to learn the basics of faceplate-turning.
The angle at which a tool is presented on the work will influence the cut. The shear angle will affect how clean the cut is. Although a square saw can be used to cut the wood, a 45deg angle produces a cleaner finish. The 45-degree angle will give the cut more shear. It also produces a smoother surface. Use a saw or a sharpening knife to enhance the look of your cut.
Spindle roughing gouge
A spindle roughing chisel is used to aggressively reduce square or rectangular blanks of spindle into round cylinders. The spindle-roughing gouge is not designed to be used to turn bowls. Its cutting edge is sharp and can be used to cut into the grain. It can, however, be used cross-grain for projects such as turning bottles stoppers.
Use a spindle roughing saw to avoid cutting cross grain. The tool's geometry measures 45 degrees. This makes it difficult to cut across the grain. Also, the tool size and flute shape can cause trouble. This tool is best used by someone who has a lot of woodworking experience. These are some helpful tips for beginners and seasoned professionals.

First, make sure to use the correct angle. If you are using a spindle to roughen the gouge, ensure that your back hand controls the tool and that your left hand is used for guidance. Use your index finger to wipe off any dust while you are cutting. Next, ensure that the cutting edge touches the wood. The cutting edge will leave behind shavings, which are a sign of the proper position. Move on to the next stage after the wood is cut.
Bowl gouge
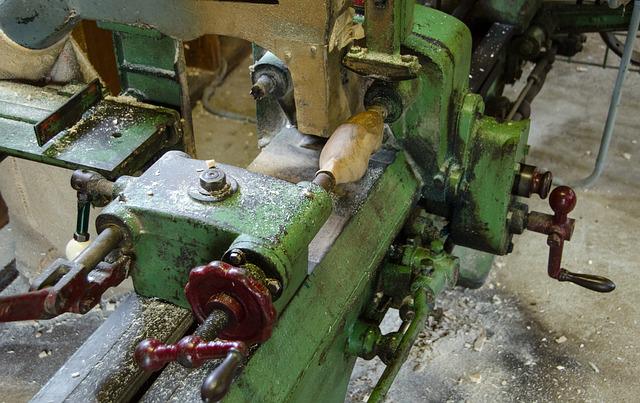
A bowl gouge is a high-quality turning tool that is used to remove material from the inside of a bowl. This tool is made of high-speed steel with a brass ferrule. Adjust the height of the tool-rest to make the bowl shape you want to use the bowl gouge. Swing the handle forward and backward until the desired depth is reached.
You can find a variety sizes and shapes for a bowl gouge. For beginners, a bowl gouge with a diameter of about 1/2" is the best. A 3/4" or larger gouge can be used by more experienced wood bowl turners for finishing cuts. A larger gouge can be used to turn large bowls and as a wood plow. Different sizes of gouges have different grind profiles. A gouge's cut edge is the curved region around the bevel. Rub your finger against the gouge to check its sharpness.
Skew chisel

It is essential to know how to properly use the skew saw chisel when turning wood. Before you can cut with the skew chisel, it is essential to understand how to do both shallow and long taper cuts. You should use the heel of the skew's edge, and adjust the angle of the chisel's presentation to the spindle accordingly. A 20-30 degree skew angle is ideal for planing and V-cutting, as well as forming beads.
A skew chisel is a tool that can be used to turn wood. It will allow you to quickly and efficiently cut V-grooves. First, you should position the toolrest high and use the long point of the tool to define the centerline of the V-groove. Then, elevate the handle to make the groove deeper. Then alternate between cutting to the right or left until you get the desired groove depth. Once you have completed the cut roll the skew’s endbevel to the side.
FAQ
How can I learn basic woodworking skills
It is an excellent way to learn how to build furniture. You can make a simple bench yourself. You can do this project using any type of wood you have on hand at home. If you are unsure what type of wood is best, you can get cheap pine boards at Lowes (or Home Depot) instead. After you've constructed your bench you'll want sand all the rough edges off and varnish it.
How do I get started with woodworking?
The best way to learn how to build furniture is by building furniture. You'll need tools, and you'll have to make mistakes along the way, but if you keep at it, you'll eventually figure out what you're doing.
Start by choosing a project you'd like to complete. It can be as simple as a small box, or as complex as a complete entertainment center. After you have decided on a project to work on, contact a local woodworker that specializes in this type of work. Ask him or her for advice on what tools you'll need and where to find them. Perhaps you could ask if there is someone else who does this type of work.
How can you calculate woodworking pricing?
When calculating the costs of any project, it is important to keep them as low and affordable as possible. Always make sure you get the best price on materials. It's also worth taking into account all the other factors that may affect the cost of your projects, such as time, skill level, and experience. Our guide to the average household DIY task price will give you an idea of how much it costs to complete different types of woodwork projects.
How long does it take you to finish a piece?
It all depends on how large the furniture is. A smaller project like picture frames or boxes can be completed in a single day. Larger projects, like desks or dining tables require several days. It takes time and effort to properly stain the wood.
How do I know what type of wood I'm dealing with?
Always verify the label on wood purchases. It should have information about the wood species as well its moisture content and whether any preservatives were used.
What's the difference between a hobbyist and a professional woodworker?
Hobbyists are passionate about making things from wood, while professionals tend to be more focused on the quality and craftsmanship of their work. Hobbyists often take pride in the creations they make and often share them to family and friends. Professionals will spend hours researching designs before they begin working on a project. They'll be meticulous about every aspect of their work, from choosing the best materials to finishing it perfectly.
What tools are used by carpenters?
Carpenters most often use a tool called a hammer. The hammer is used to pound nails into wood. A hammer is used to hold pieces together during a project. Other tools include clamps.
Statistics
- In 2014, there were just over 237,000 jobs for all woodworkers, with other wood product manufacturing employing 23 percent; wood kitchen cabinets and countertop manufacturing employing 21 percent. (theartcareerproject.com)
- Average lumber prices rose about 600 percent between April 2020 and May 2021. (familyhandyman.com)
- Most woodworkers agree that lumber moisture needs to be under 10% for building furniture. (woodandshop.com)
- The best-paid 10 percent make $76,000, while the lowest-paid 10 percent make $34,000. (zippia.com)
External Links
How To
How to make wood joints
This tutorial will help you join two pieces of wooden together. We will use the pocket hole joint, which is drilling holes in the wood to join them. This works well if the wood is straight and smooth. You might consider dowel joinery if your wood isn’t straight or flat. These are the steps
-
Drill Pocket Hole Joints. Measure and mark the location where you would like to place the pocket hole joint. With a handheld drill machine or jig saw, drill 3/4-inch deep holes in the ends of each piece.
-
Sand Smooth. Sanding the wood's edges will ensure that the joint doesn't split.
-
Glue Together. Apply glue to both the ends of the wood. Allow it to sit for approximately 5 minutes before you clamp the pieces together.
-
Clamp the Pieces Together. After the glue has dried you can attach the pieces to form a flush joint.
-
Trim Joinery. Trimming the joinery after glue has completely dried.
Make sure to leave enough room between the pieces so that you can turn them inside and out.